Omni CMS Editing
You can edit pages in Omni CMS using the JustEdit or Classic Editor interface. These editors allow you to make changes to your web page content in an easy to use word processing environment. The editor window is commonly refered to as the WYSIWYG editor (What You See is What You Get.)
To edit a page, log in through the DirectLink or go to Content > Pages and click on the section you are working in and then the file name of the page.
View this video from OmniUpdate that explains how to edit using the WYSIWIG editor.
WYSIWIG Toolbar

The What You See Is What You Get (WYSIWYG) toolbar is similar to other content editing toolbars, with additional Omni CMS-specific options.
When entering an editable region content editors encounter the WYSIWYG toolbar, with buttons to represent every function available to the user. Clicking a button in the toolbar performs an action, either directly to the page, or to the selected text and media. Some buttons display more options in a dropdown menu or popup box.
The availability of a function is based on the location of the cursor on the page. For example, if no object is selected the "Insert/Edit Link" is dimmed, signifying that this function is not available at the moment. For the "Insert/Edit Link" button to be available, the user must first select text or a graphic.
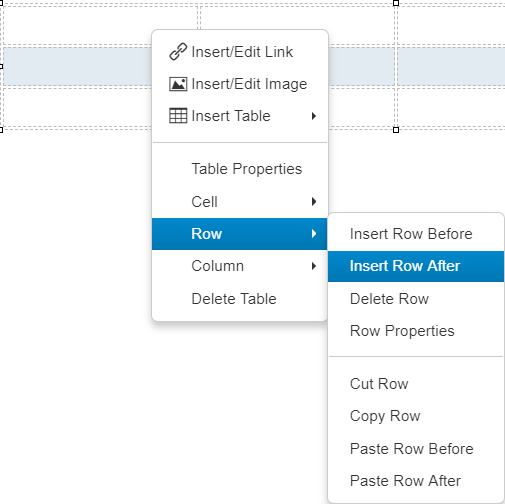
Right-click for contextual functions. For example, right-clicking within a table provides a list of table editing functions.
Toolbar Options
For a detailed overview of the WYSIWIG toolbar options, visit this page on OmniUpdate. This goes over all the options available to you. Please read these options over carefully and become familiar with what each icon represents. This will aid you when editing content.
- From the Page Actions Toolbar, click on the Edit button.

- Click on a green, editable region button to open that region.
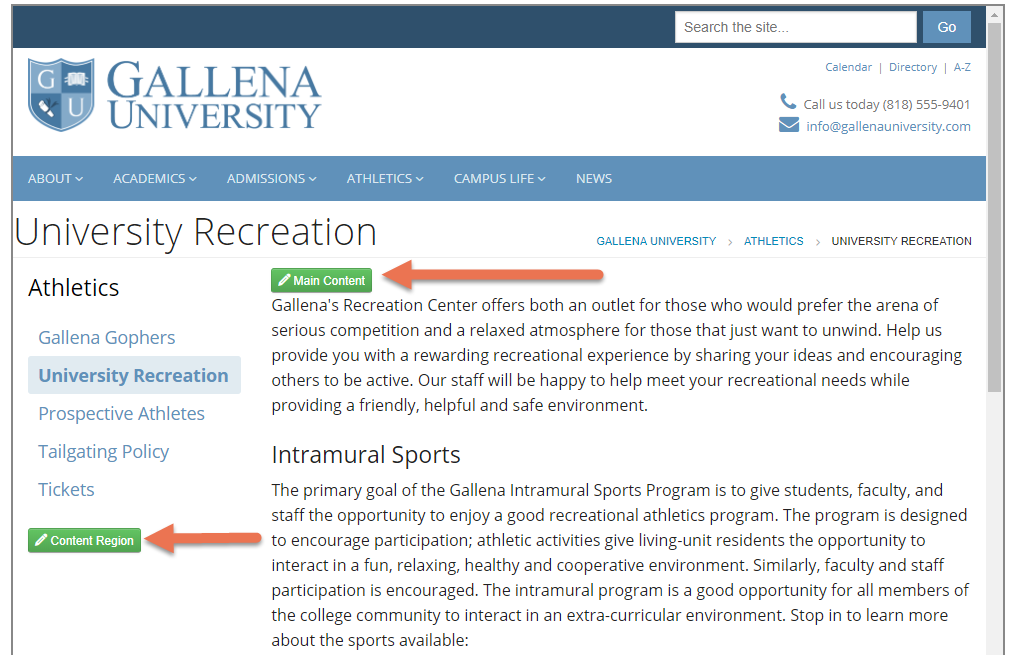
The Page Actions toolbar contains options for editing your page.

- Preview: View how the page will look on your website.
- Edit: View editable regions for the page.
- Source: Edit the source code of the page.
- Properties: Edit title, tags, layout options, and other items such as the log and RSS feed.
- Versions*: View a list of saved versions of the page.
- Save*: Save the page and exit the What You See Is What You Get (WYSIWYG) toolbar.
- Page Status: The page is checked out to you when the lightbulb is yellow.
- Publish: Publish the page to your live website or Submit the page for approval.
- Toggle Focus Mode: Maximize the page content in your display window.
- More Actions: View the following options:Page Check*: Scan the page for spelling, link, and accessibility issues.
- Save Version*: Save the page to the versioning archives.
- View Published Page: See the page on your default publish target.
*Only visible if the page is checked out to you.
- Open an editable region.
- Add, remove, or edit text using your computer keyboard.

JustEdit
- Open an editable region.
- From the JustEdit toolbar, select the Insert/Edit Image icon in the toolbar.
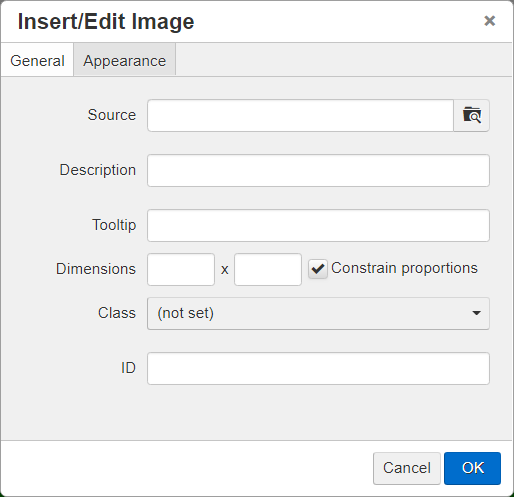
- Select the General tab at the top of the Insert/Edit Image box.
- Next to the "Source" field, click the browse button.
- Navigate through the Omni CMS folder structure and select the appropriate image.
- Click "Insert" in the bottom right corner of the Select Image box.
- Add a "Description"; this field is used as the alt text for the image.
- Add a "Tooltip," adjust the "Dimensions," select a "Class," and add an "ID" as needed.
- Select the Appearance tab at the top of the Insert/Edit Image box to make adjustments to the image's appearance on the page.
- Adjust the "Alignment," "Vertical space," "Horizontal space," "Border width," and "Style" as needed.
- Click OK in the bottom right of the box.
- To reopen and edit the image, select the image and click on the Insert/Edit Image icon from the toolbar.
Classic Editor
- Open an editable region.
- From the Classic Editor toolbar, select the Insert/Edit Image icon (Insert/Edit Image Icon).
- Select the General tab at the top of the Insert/Edit Image box.
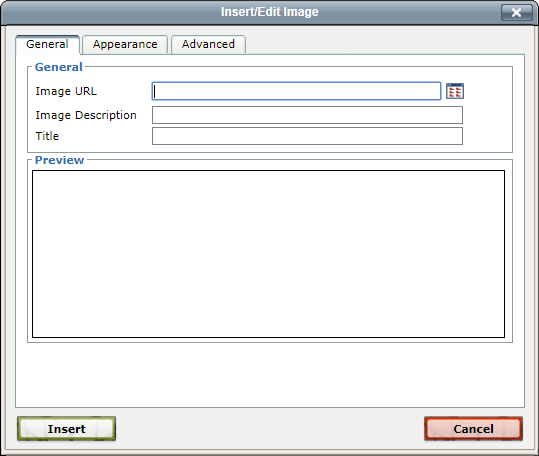
- Next to the "Image URL" field, click the browse button.
- Navigate through the Omni CMS folder structure and select the appropriate image.
- Click Insert in the bottom right corner of the Select Image box.
- Add an "Image Description"; this field is used as the alt text for the image.
- Add a "Title" as needed.
- Select the Appearance tab at the top of the Insert/Edit Image box to make adjustments to the image's appearance on the page.
- Adjust the "Alignment," "Dimensions," "Vertical Space," "Horizontal Space," "Border," "Class," and "Style" as needed.
- Click Insert in the bottom left of the box.
- To reopen and edit the image, select the image and click on the Insert/Edit Image icon from the toolbar.
To add a video or other playable media to a page, we have an extra step involved in order to make the video responsive.
- While editing an editable region, click the Insert Snippet button
 in the WYSIWIG toolbar.
 - Select Video and answer the questions. If it is a Vimeo video, be sure to anwer Yes on the second question.
- In the space for the video on the snippet, click the Insert/Edit Media button
 in the (WYSIWYG) toolbar.
 - In the "Source" field, paste the external web address or click the file chooser
 .
. - From file chooser, navigate through folders in your Omni CMS site.Search an auxiliary site or other environment, using the dropdown.
- Click the file to link.
- Click Insert.
- Enter new values in the "Width" and "Height" fields to modify the dimensions of the media.Click the lock icon to constrain proportions.
- Click Save.
See WYSIWYG Editor Advanced Fields for additional media options.
Embed Code
If you are adding media from an external source that provides an embed code (such as Vimeo or YouTube), paste the code into the "Embed" tab of the "Insert/Edit Media" box. Then click Save.
We recommend embedding videos via Insert/Edit Media in the WYSIWYG toolbar. If you embed a YouTube video by pasting it into the source
code of your page, you might encounter an error where the page cannot be edited. The
error is caused by the default YouTube embed code being empty between the <iframe> and </iframe> elements and can be fixed by adding an between the <iframe> and </iframe> elements. Alternatively, add in a comment between the starting and closing <iframe> elements to prevent an empty iframe.
JustEdit
- Open an editable region.
- Type the text of your link.
- Highlight the text.
- From the JustEdit toolbar, select the Insert/Edit Link icon.
- Select the Basic tab at the top of the Insert/Edit Link box.
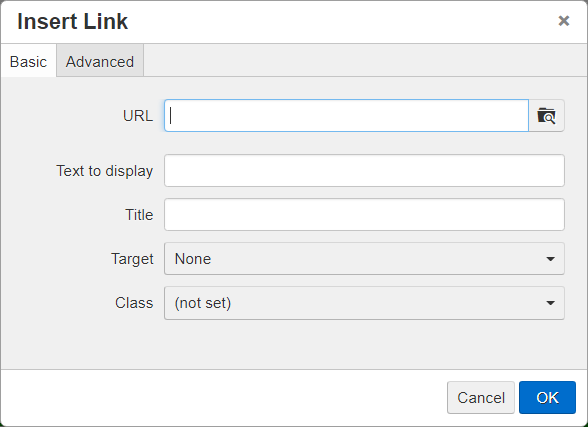
- To link to external web pages, add the fully qualified URL to the "URL" field.
- To link to other content managed within Omni CMS, click the browse button next to the "URL" field.
- Navigate through the Omni CMS folder structure and select the appropriate page/file.
- Click Insert in the bottom right corner of the Select File box.
- Adjust the "Text to display," add a "Title," select a "Target," and select a "Class" as needed.
- Click OK in the bottom right of the box.
- To reopen and edit the link, place your cursor inside the link text and click on the Insert/Edit Link icon from the toolbar.
Classic Editor
- Open an editable region.
- Type the text of your link.
- Highlight the text.
- From the JustEdit toolbar, select the Insert/Edit Link icon (Insert/Edit Link).
- Select the General tab at the top of the Insert/Edit Link box.
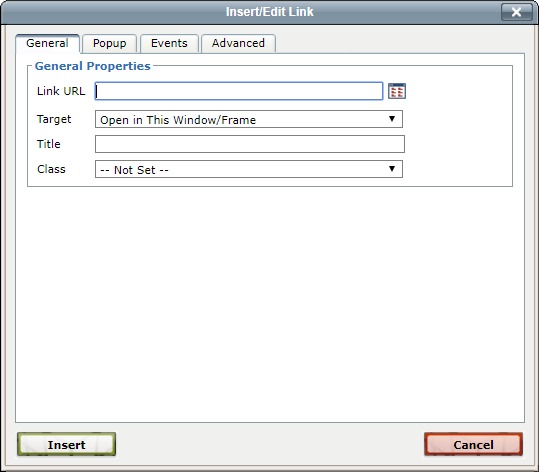
- To link to external web pages, add the fully qualified URL to the "Link URL" field.
- To link to other content managed within Omni CMS, click the browse button next to the "Link URL" field.
- Navigate through the Omni CMS folder structure and select the appropriate page/file.
- Click Insert in the bottom right corner of the Select File box.
- Select a "Target," add a "Title," and select a "Class" as needed.
- Click Insert in the bottom left of the box.
- To reopen and edit the link, place your cursor inside the link text and click on the Insert/Edit Link icon from the toolbar.
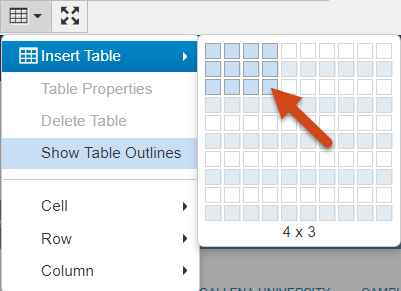
- Open an editable region.
- From the Classic Editor toolbar, select the Table icon.
- Hover over "Insert Table."
- Hover to select the appropriate number of rows and columns.
- Click on the bottom right cell to insert the table.
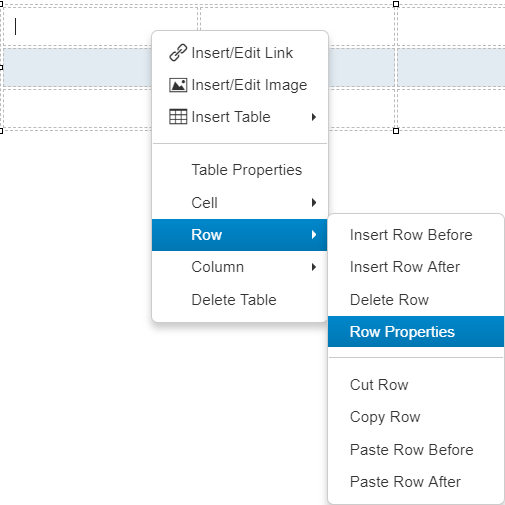
- To create a table header row, right click on a row, hover over "Row" and click "Row
Properties." Choose "Header" from the "Row type" dropdown and click OK.
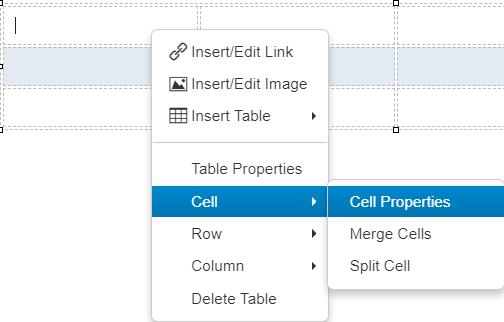
- To select a table cell scope, right click on a cell, hover over "Cell" and click "Cell
Properties." Choose the appropriate scope from the "Scope" dropdown and click OK.
- To add or remove rows and columns, right click on the table, hover over "Row" or "Column" as appropriate, and click an "Insert..." or "Delete..." option as appropriate.
View this page on OmniUpdate for detailed information on using table properties, cell/row properties.
Page parameters control preconfigured aspects of a page—title, metadata, and custom settings such as layout or header content. To view page parameters, the page must be checked out to you. Only users levels 5 through 10 can edit page parameters.
There are two ways to access page parameters:
While viewing a checked-out page, click Properties in the page actions toolbar.
From Content > Pages, check out the page, click More Actions > Edit > Properties.
Title and Metadata
The following fields are always present in the "Properties" section:
- Title: The title that displays on your live website.
- Description: Displayed by search engines if the page comes up as a search result.
- Tags: Tags in Omni CMS filter content, and (depending on your site design) are used to categorize news and search results. Type into the field to enter tags; any preexisting tags appear in the dropdown, but you can also add new tags to the page. Depending on the tag access settings, your choice of tags may be restricted.
Other commonly-used fields include Author (common on news and blog articles) and Keywords (used for limited search engine optimization [SEO] purposes).