My Mediasite
My Mediasite
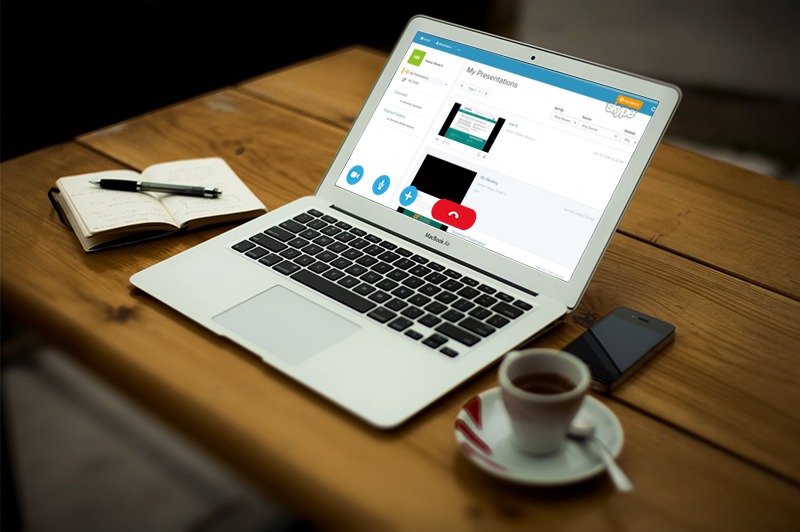
My Mediasite allows UTHSC faculty, staff, and students to capture, publish, manage, and share original videos directly from their computer to a Mediasite server.
About
My Mediasite has two components: the My Mediasite account and the My Mediasite desktop recorder (MDR). You can log in to your My Mediasite account using your UTHSC NetID. Inside, you can access all of your created and uploaded media.
- My Mediasite has two components: the My Mediasite account and the My Mediasite desktop recorder (MDR). You can log in to your My Mediasite account using your UTHSC NetID. Inside, you can access all of your created and uploaded media.
- Your My Mediasite account is where your recorded videos, or media, will be stored.
Faculty can also obtain viewer analytics, create quizzes and more.
Any videos users previously streamed on the Mediasite Cloud should appear in your My Mediasite portal. - If you login to your My Mediasite account and cannot locate your videos, submit a Tech Connect Ticket for assistance.
- My Mediasite desktop recorder (MDR) is a companion application that can be used to create original videos by recording individual screens or presentations.
The desktop recorder can be accessed and downloaded from your My Mediasite account to your personal device to create new video presentations.
Benefits
Research (Topale, 2016) offers that students perceive a significant benefit in using recorded lecture video to self-regulate and direct study. Other research (Kinash, Knight, & McLean, 2015) suggests that the availability of video contributes to student achievement. Additional benefits of using My Mediasite to manage and create video presentations include:
- Content is available on demand anywhere over the internet.
- My Mediasite is accessible within Blackboard making it more convenient to add videos to courses.
- Faculty can create repositories of educational lectures in a secure, central location.
- My Mediasite tools support creating interactive videos that promote active learning and knowledge retention.
- Students can view content at their own pace.
- Users can upload videos in a variety of formats including MP4 (preferred), FLV, MPEG, and MOV.
- Faculty can use embedded quizzes and polls to check understanding and boost engagement.
Login to My Mediasite
Support
Additional information concerning My Mediasite, including tutorials can be found on this page.
For support and assistance with My Mediasite technical issues:
Call 901-448-2222 or submit a Tech Connect Ticket.
Resources
| Computer or Mobile Device | Requirements |
| Microsoft Windows |
|
| Apple MacOS |
|
| Apple iPadOS |
|
| Apple iOS |
|
| Google Android |
|
- First, visit the UTHSC My Mediasite webpage and log in with your UTHSC credentials to access your account and start using My Mediasite.
- Then, once you are inside your account, you can upload and manage your videos as well as download the My Mediasite Desktop Recorder (MDR) to create new videos.
With Mediasite Capture, recording is effortless. Simply use a web browser to capture your video learning. No manual setup, no software installation. It’s the ideal solution for independent content creators who need a fast, intuitive way to share knowledge.
· The MDR offers four basic options for creating and capturing lecture content:
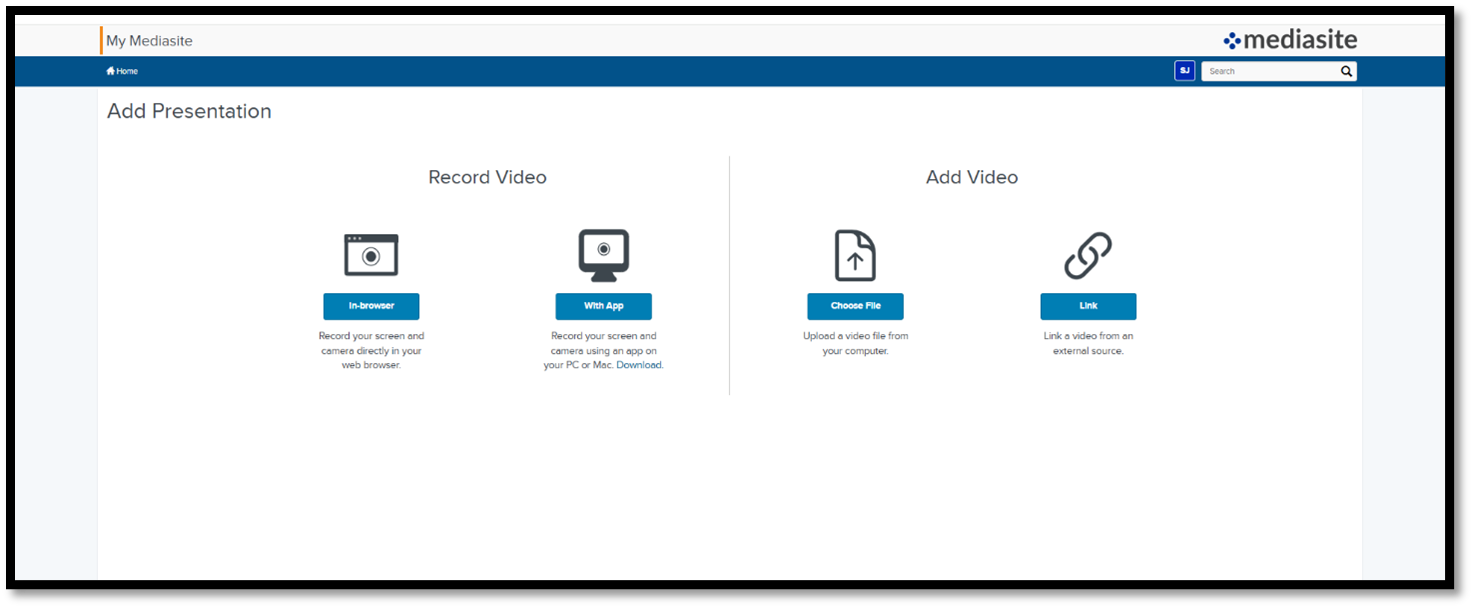
- Record Video In Browser: Record your screen and camera directly in your web browser. Watch a helpful video here.
- Record Video With App: Record your screen and camera using an app on your PC or Mac. Download.
- Add Video: Upload a video file from your computer.
- Add Video: Link a video from an external source.
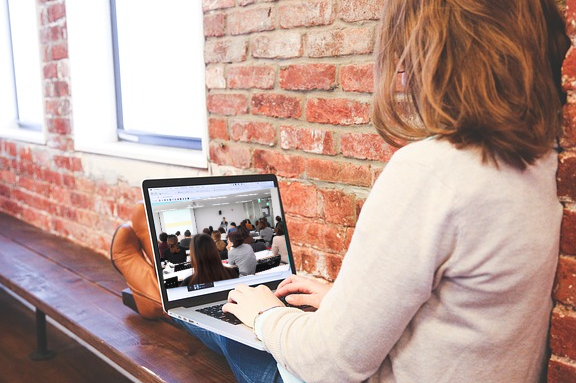
Video Tutorials For Students
Discover how to search, play and interact with Mediasite videos embedded in your Blackboard Ultra LMS course.
| Lecture 1.1 | What is Mediasite? |
| Lecture 1.2 | Watch a Mediasite Video within Blackboard Ultra |
| Lecture 1.3 | Search for a Video within Blackboard Ultra |
| Lecture 1.4 | Video Comments in Blackboard Ultra |
| Lecture 1.5 | Take a Mediasite Video Quiz in Blackboard Ultra |
Video Tutorials For Instructors
For faculty, instructors, and professors, Mediasite's integration with Blackboard Ultra makes it easy to create, manage, and watch your course videos all from within the Blackboard LMS.
| Lecture 2.1 | Access My Mediasite from within Blackboard Ultra |
| Lecture 2.2 | Add a Video to Mediasite |
| Lecture 2.3 | Add a Mediasite Channel to Blackboard Ultra |
| Lecture 2.4 | Add a Mediasite Video to your Blackboard Ultra Course |
| Lecture 2.5 | Upload a Video to Blackboard Ultra |
| Lecture 2.6 | Add a Mediasite Screencast to Blackboard Ultra |
| Lecture 2.7 | Upload a Video from Your Phone to Blackboard Ultra |
| Lecture 2.8 | Add a Recorded Lecture to Blackboard Ultra |
| Lecture 2.9 | Edit Your Video from Blackboard Ultra |
| Lecture 2.10 | Adding Captions to Your Video Presentation Blackboard Ultra |
| Lecture 2.11 | Use and Enable Comments For Mediasite Videos within Blackboard Ultra |
| Lecture 2.12 | Creating a Quiz for Your Mediasite Video from within Blackboard Ultra |
| Lecture 2.13 | Using In Video Quizzes within Blackboard Ultra |
Before you begin recording, it is important to make sure your recording environment is conducive to recording high-quality video and audio. You also want to think about how you want to present your information and the type of content you want to include. Understanding what your content will be in advance will help you decide which recording option to choose.
If you need to record your whole screen, it’s a good idea to tidy up your desktop a bit. Tone down any distracting desktop wallpaper, maybe clean up the files that are showing, and be sure to turn off notifications.
Recording equipment and environment
Before you get started, make sure your equipment and environment are ready for recording:
- Audio. For audio recordings, you need either a built-in microphone or an external microphone. If your computer does not have a built-in microphone or if you are recording in a location with significant background noise, use a headset with a microphone to eliminate ambient noise.
- Video. For recordings that include video, you need a microphone and a webcam. Make sure your webcam rests at or slightly above eye-level and you are centered in the video capture area.
- Sound. Adjust and test your microphone so that you sound clear and audible. Try to keep the microphones 6 to 8 inches from your mouth to avoid picking up breathing. If you are using a headset for recording, make sure that the microphone is roughly one inch from the corner of your mouth. Do an audio recording test to ensure that the audio sounds clear during playback.
- Lighting. Use bright, even lighting whenever possible. Appropriate lighting is critical to obtaining a high-quality video for your presentation. Illuminate yourself and reduce glare from the monitor by using a lamp. You can also use background lighting, such as ceiling mounted lights, but make sure they are not as bright as your main light source.
- Background. Avoid using a plain white wall or a wall with small or busy patterns. Whenever possible, use a solid color background. If necessary, hang a solid color sheet as a backdrop. Videos with a solid-color backgrounds compress cleanly and efficiently.
- Reduce ambient noise. Turn off unneeded appliances or electronics that may create ambient noise. Keep your recording space quiet, turn off your phone, and if others are working in the area, let them know you will be recording.
- Clean up recording area. Make sure to clean up your recording area and remove any clutter or items that may distract your audience.
Recording Presentation
Here are some best practices that will help you record a professional quality presentation.
- Practice presentation to avoid verbal pauses. Read your presentation aloud a few times prior to recording. Practicing should help you reduce verbal pauses such as "um" when recording your presentation.
- Avoid reading slides. Do not read slides to your audience. It will quickly bore your audience if you are reading something they can read for themselves.
- Do not move around excessively. Minimize excessive movements that may be distracting to your audience, such as twirling your hair or fidgeting with an item in your recording area.
- Engage your audience. To keep your audience's attention, your goal is to be as engaging as you would be if you were presenting to a live audience. Speak in a conversational tone, smile, and vary your intonations.
- Don't worry about mistakes. Don't restart the recording for mistakes. You can continue as normal and bridge the mistake by pausing and repeating yourself (if you feel it is necessary) and moving forward.
- Use strong voice inflection. If you are not using video in your presentation, make sure to use strong voice inflection and to repeat key points in the presentation for emphasis.
Pedagogy
- 6 Ways to Raise the Bar on Higher Ed Videos - Weaver, J. (March, 2016), Inside Higher Ed
- 10 Tips for Creating Effective Instructional Videos - Smedshammer, M. (March, 2017), Faculty Focus
- Adapting PowerPoint Lectures for Online Delivery: Best Practices - Moore, E. (January, 2013) in Faculty Focus
- Effective Educational Videos - Center for Teaching, Vanderbilt University
- Screencasting to Engage Learning - Ruffini, M. (October, 2012), Educause Review
- Screencasts: Best Practices - Centre for Teaching Excellence, University of Waterloo
Design
- Start with a storyboard that outlines the sequence of what you will say and show. You can save time by using a storyboard template such as this TLC sample or by downloading other free samples. Write a script so that you will have a transcript to upload in order to meet accessibility requirements.
- Utilize effective instructional design techniques to meet your course goal by inserting course objectives, intended outcomes, and linked opportunities. Consider using video annotations to list aligned objectives and outcomes as well as providing links to external resources. In addition, using polls and short quizzes within the video helps students self-assess and reinforces learning. Quiz results can be used for students to self-assess and for faculty to gain feedback.
- Consider the science of learning when you design your video. Along with good instructional design, keeping distractions to a minimum supports student learning. Mayer's 12 Principles of Multimedia Learning, as explained in the video by Dr. Kacz (2017), offers a plausible foundation for effective design and organization. Mayer (2001) established that people learn better from words and pictures than words alone. Faculty can enhance student leaning with appropriate, high-quality images such as those in the NHGRI Image Gallery at no additional cost.
- Increase engagement with such methods as chunking content, establishing presence, and inserting relevant visuals. The concept of chunking is particularly important. George Miller's early research (Cowan, 2013) on information processing discovered that by breaking large bits of information into 5-9 smaller, meaningful parts, faculty can support student knowledge retention. Cognitive Load Theory (Sweller, 1988) affirms that chunking increases germane load which is dedicated to processing and building schemas. Schemas are acquired when individuals put the 'pieces' together. As explained in this 3 Minute Ed Theory video, faculty as instructional designers can manipulate content in a way that affects germane load and promotes long-term information storage. Use a video editor to break apart larger videos into more manageable parts. For example, faculty can cut a 60 minute video into six 10-minute videos, or microlessons.
References
Sweller, J. (1988). Cognitive load during problem solving: Effects on learning. Cognitive Science, 12, 257-285.
Below are links to recent research pertaining to teaching and learning with screencast videos and lecture capture.
Teaching
Kaltura Fifth Annual State of Video in Education 2018 Report
Learning
My Mediasite Recorder
How do I download the My Mediasite desktop recorder?
Can I record my computer screen with My Mediasite?
Can I use My Mediasite to record my PowerPoint slides?
What is the difference between slideshow and a screencast?
Managing and Publishing Presentation Videos
Who can watch my presentation?
Can I add other resources to my presentations?
Can I track if my students watched my presentation?
Using My Mediasite in Blackboard
Can I access My Mediasite in Blackboard?
How do I update the UTHSC-TV links in Blackboard?
What if I need help getting my presentations in Blackboard?
Answers
My Mediasite Recorder
How do I download the My Mediasite desktop recorder?
Log in your UTHSC My Mediasite account and follow the installation instructions for your Windows or MAC device.
Can I record my computer screen with My Mediasite?
Yes, you can use the Screencast + Audio and Screencast + Video options to record your screen as a full-motion video. These options allow you to create a screencast that shows mouse movement on your computer screen.Can I use My Mediasite to record my PowerPoint slides?
Yes. The Slideshow + Video and the Slideshow + Audio options will allow you to record a snapshot of your screen and is generally used to record PowerPoint slides (or other text an still images).
What is the difference between slideshow and a screencast?
Slideshows are still images of your screen captured at 4-5 frames per second. This is also the lowest bandwidth video you can create with MyMediasite. When recording a slideshow, you can remove slides you don't want using the editot in your My Mediasite account. Screencasts are motion-based videos ideal for annotations and animations. Learn more about the differences.
Managing and Publishing Presentation Videos
How do I upload a video file?
After logging into your account, you can easily upload your video and have it available in Blackboard or another site for your students or collegues to view. Download and print instructions for uploading a video.
Who can watch my presentation?
For others to see your video, you must set the status to Viewable. By default only individuals with a UTHSC NetID and password will be able to watch your viewable videos if they have access to a place where the presentation is shared or if you shared the presentation link with them directly. If you want to configure your presentation to be publicly accessible (shared or embedded on an external site) contact the Mediasite administrator at tlc@uthsc.edu.
How do I share my video?
To share your videos, open the video in your My Mediasite account. Then you will need to set the video status to Viewable and click the Share Presentation button. You will be presented with a link and embed code to share your presentation.
Can I create my own channel?
Yes, you can create multiple channels in your My Mediasite account and publish your presentations to the desired channel. Channels can be used to organize your presentations and share content. Learn more about channel creation.
Can I add other resources to my presentations?
You can add annotations, links, and other resource links to your presentations to engage learners with the topic or supplement content. To add resources, follow the steps in the video.
Can I track if my students watched my presentation?
You will have access to detailed analytics for each of your presentation videos. These analytics can be helpful for understanding how students engage and interact with the presentation. Explore how to investigate usage with analytics.
Using My Mediasite in Blackboard
Can I access My Mediasite in Blackboard?
My Mediasite is available from directly within Blackboard via the Mashup tool so that you can access your video presentations without leaving your course. Follow this guide to share My Mediasite content in Blackboard.
How do I update the UTHSC-TV links in Blackboard?
If you need to replace UTHSC-TV video links with the new corresponding My Mediasite links, you can do so fairly quickly from within Blackboard as well. Follow the steps in the video to replace your links or download and print them for later.
What if I need help getting my presentations in Blackboard?
Teaching and Learning Center academic technology consultants are available to asst you. Send an email to tlc@uthsc.edu or phone us at (901) 448-1218.